Now you can Automatically do Mouse Clicking on Windows 10 with Auto Mouse Click Software. This post talks in detail about the software and provides Free trial download link. Yes apart from Windows 10, you can use this Mouse Clicking Software on other versions of Windows as well. Apart from supporting Mouse Clicks of every type, you can even automate Mouse Scrolling, Mouse Dragging, Keyboard Typing and much more.
Auto Mouse Click on Windows 10
Download this Auto Mouse Click Software for Free and try it without any functionality limitations. There are lots of Video Tutorials available for this software to assist you in easy learning of the Mouse and Keyboard Automation Supported by this Auto Mouse Click Software. You can even schedule the automatic mouse clicking to be done at a later date time with this software. As the Mouse Clicking is done at pre-defined screen locations identified by X and Y Co-Ordinates, Current Mouse Cursor location is always displayed in the status bar of the software. With Global Keyboard Shortcut support, you can let the software pick the screen location for Mouse Clicking Automatically. By controlling the Time delay between consecutive Mouse Clicks, you can control the speed of Mouse Clicking done by the software.

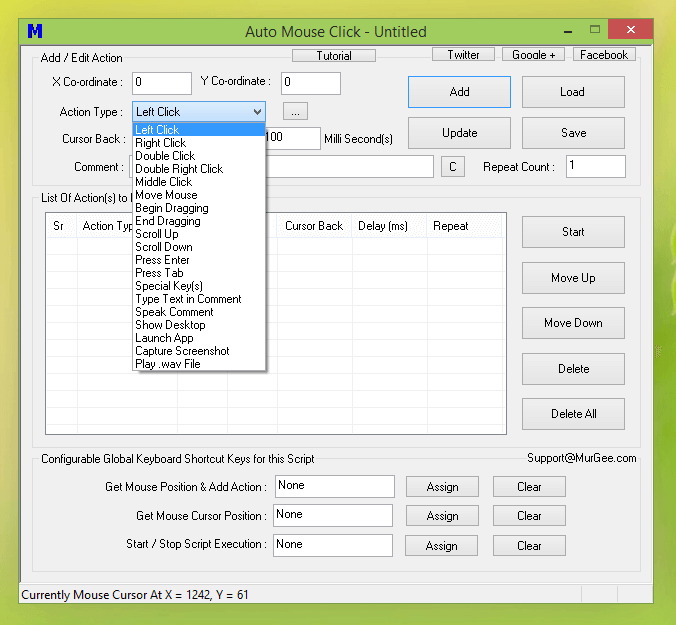
Left, Right, Middle Mouse Click in a Macro Script
There are lots of Actions which can be automated by this Auto Mouse Click Utility. You can start Windows Automation with this software by automating Left Mouse Clicks, and once you are comfortable in using this Application, you can proceed ahead and create your Macro Script to Automate Right Mouse Click, Middle Mouse Click, Mouse Scrolling, Mouse Dragging and much more. With Video Tutorials, you can watch how to automate every action supported by this Windows Automation Software. In order to identify each macro script easily, you can assign a background image, change text color or change background color of the Macro Script Window. You can also watch a Feature Tour Video which displays all the features of the software captured on a Windows 10 Computer. In case you would prefer to view screenshots of the software, just read on and there are lots of screenshots presented below.
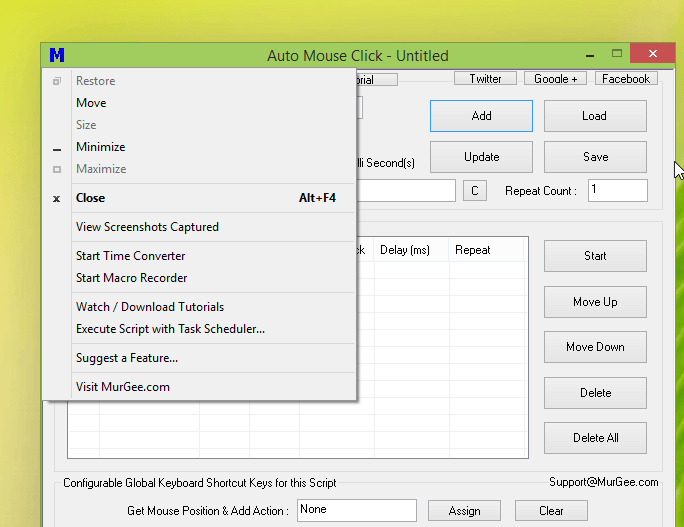
Auto Mouse Click System Menu offering Macro Recorder, Time Converter, etc
The above Screenshot displays System Menu of Auto Mouse Click offering a built in Macro Recorder to Record and Playback Mouse and Keyboard Actions. The System Menu can be invoked by clicking on the top left corner of the software and provides link to Video Tutorials, allows you to launch Time Converter and the Macro Recorder. In case you feel that any feature is missing in the software, you can use the Suggest a Feature Menu command to connect to the software developers and get your suggested feature implemented for free.
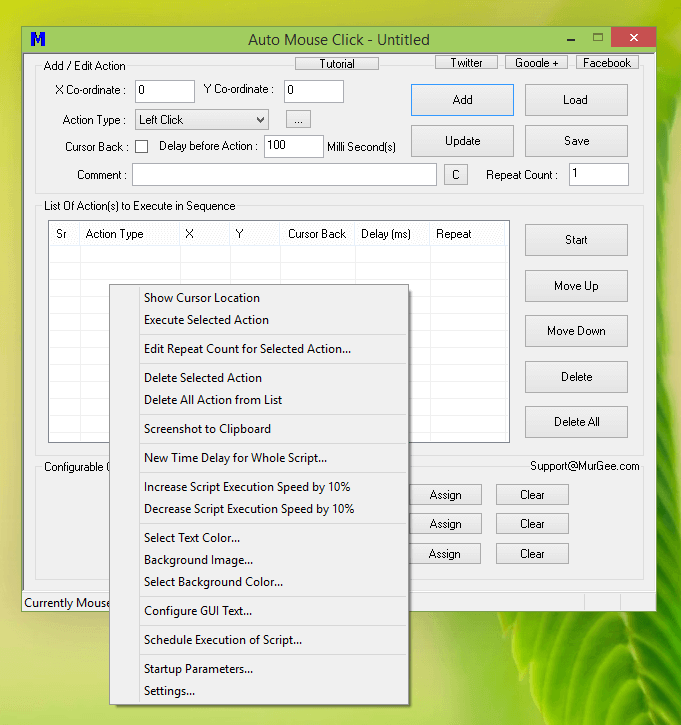
Right Click Menu of Auto Mouse Click captured on Windows 10
When working with multiple actions in a Script, the right click menu offers easy configuration and control of the action parameters. By doing a Right Click on the Macro Script Window, you can invoke the Right Click Menu and change Time Delay before any Action of the Script. The Time Delay is configurable in Milli-Seconds which is 1000 for 1 second. For easy Time Calculations, you can launch the Time Converter from the System Menu which allows easy Time Unit conversion. In case you would like to change the Time Delay of all the Actions in the script, you can use the Right Click Menu and change the Time Delay of Whole Script as displayed below. Also note that, you can also launch the Time Converter from this New Time Delay for whole Script window.
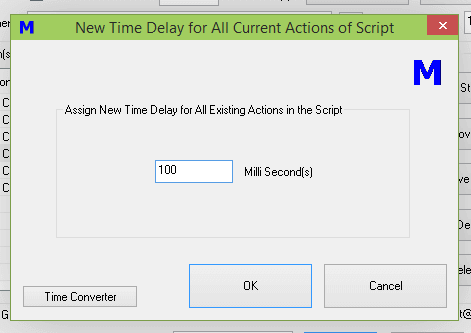
Change Time Delay of Whole Auto Mouse Click Script
Instead of changing Time Delay Interval of the whole script, you can also reduce the Time Delay of whole Script by 10% from the Right Click Menu of the Software. Once you have configured all the parameters of the Script, you can execute the script by using the Start Button on the Main Screen of the Software. You can also schedule the script to run at a later date / time using either Task Scheduler or with built in Scheduler. Using the inbuilt scheduler is quite easy and only requires you to select the script execution date time as displayed in the screenshot below. You can abort the script scheduled execution by just closing the Script Window.
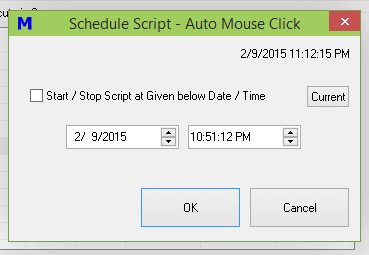
Schedule Auto Mouse Click Script to run at a Later Date and Time
The In-built Scheduler of Auto Mouse Click is useful to execute or playback the script at scheduled Date / Time. In case you would like to execute or playback the Auto Mouse Click Macro Script multiple times, you need to use Windows Task Scheduler. The Start-up Parameters Window of the Software controls how the Auto Mouse Click Script would behave. The given below screenshot displays how you can auto execute the macro script, automatically minimize the script window,
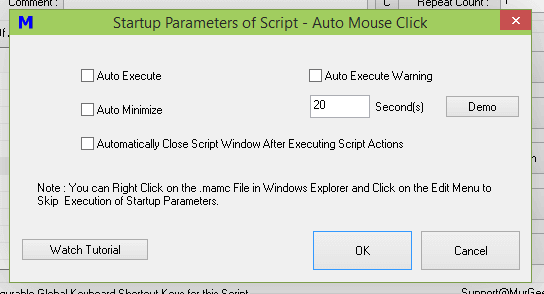
Control Startup Parameters of Auto Mouse Click Script Window
Note in the above screenshot that you can enable Automatic Execution of the Macro Script, Auto Minimize or even Automatically Close the Macro Script Window after the Playback of the Script is complete. The Auto Execute Warning displays a warning message for configurable time duration so that you can cancel the automatic script execution for erroneous script launch. In case you do have a Auto Mouse Click script with Auto Execute enabled, you can right click on the Script File in Windows Explorer and select Edit to skip Auto Execute and open the Auto Mouse Click Script only for editing as displayed below.

Launch Editor for Auto Mouse Click Script without Automatic Playback
Apart from Automatic Mouse Clicking, given below Actions can be automated from within the Auto Mouse Click Script. Yes the software is in development phase and new Actions are being added continuously and hence you may find still more actions available in the latest version of the Auto Mouse Click Utility. You can control which actions are visible in the Script Window by using the Visible Action controller as displayed in the screenshot below.
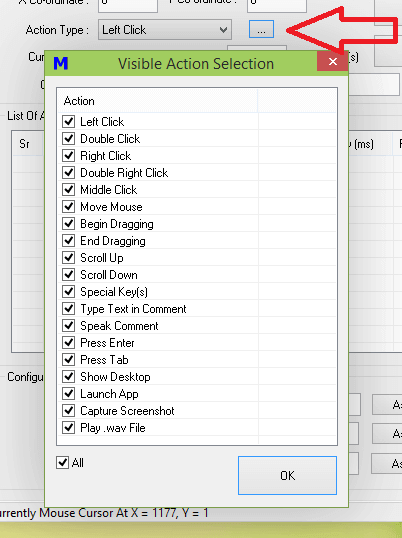
Control Visible Automation Actions listed in Auto Mouse Click Utility
Given below is the list of Actions you can execute from within the Auto Mouse Click Script. Note that the Visible Action Selection window controls the Actions listed in the Action drop down, however if the script contains a non visible action, it would still be listed in that particular script.
- Left Click to Simulate Left Mouse Click at pre-defined screen location.
- Double Click to simulate Double Mouse Click at pre-defined screen location.
- Right Mouse Click at pre-defined screen location.
- Middle Mouse Click at pre-defined screen location.
- Mouse Movement to pre-defined screen location.
- Begin Mouse Dragging from pre-defined screen location.
- End Mouse Dragging to pre-defined screen location.
- Scroll Up or Scroll Mouse Wheel by 1 Notch.
- Automate Special Keys like Enter, Tab, Function Keys, Ctrl, Alt or Combination of keys with the help of .NET Installed on your Windows Computer.
- Simulation of Text Typing onto Active Window. Note that you can Automate English and Non-English Characters with this Action.
- Text to Voice Conversion with default Speech Configured in Control Panel.
- Pressing of Enter or Tab Key without using .NET .
- Showing Desktop by Minimizing all Windows.
- Launching an Application or Opening a Document with default Software.
- Capture Screenshot and save it to the Captured Screenshots Folder. You can view the Screenshots captured by opening the folder as pointed by a Menu Command in the System Menu.
- Playing of a .wav file for Audible Alerts.
- Finally you can add a Left Mouse Click at Current Screen Location by adding a Left Click Action at X = 999 and Y = -999.
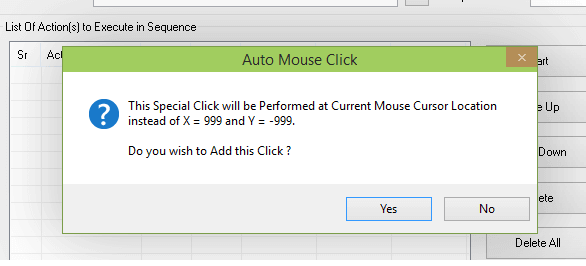
Left Click at Current Mouse Position from within Auto Mouse Click Script
Although above list of features might sound like too much for a simple Windows Automation Tool, you will find that all the features of the software have been carefully implemented and are really useful. Whether you wish to do Fast Clicking on a Webpage, Online Flash Game or a Desktop Game, the Auto Mouse Click Software is equipped with all the features of a Mouse Automation Tool. As the Mouse Clicking done by the software is on fixed screen location, changes in Screen Resolution can easily break the script. Yes this Windows Automation Utility works fine on a Windows 10 Computer running on either 32 bit or 64 bit architecture. Download the software for free and try it’s features without any functionality limitations and once you are happy with the software, you can unlock your trial by paying in Activation fees once your free trial has expired.